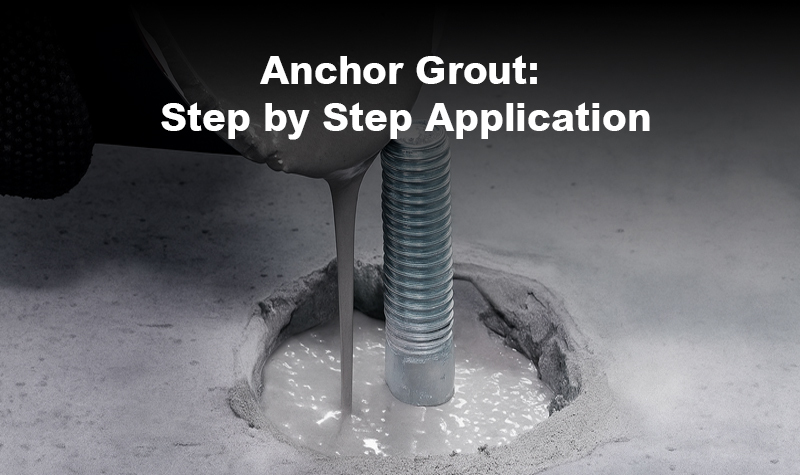
Anchor grout is a high-performance epoxy or cementitious material used for anchoring fasteners, steel bars, and bolts to masonry or concrete. It is a very important product in structural engineering because it provides secure connections between concrete and steel. Used in bridges, buildings, machinery foundations, or industry equipment, anchor grout offers load transfer, vibration resistance, and durability.
This is a step-by-step, end-to-end guide to the proper application of anchor grout for optimal life and performance.
What is Anchor Grout?
Anchor grout is a specially designed material that is used to seal gaps between anchor parts and the related concrete or masonry. It holds and supports the anchor.
Grouts are:
- Cementitious-based: Cost-effective and easy to use, suitable for lightly loaded or static use.
- Epoxy-based: Chemical-resistant and high-strength, for dynamic or heavy-duty loads.
Both are applied according to application needs, environmental conditions, setting time, and structure type.
Where is Anchor Grout Applied?
Anchor grout is usually applied in:
- Structural steel column installation
- Anchoring construction joints' rebar
- Fixing equipment and machinery
- Reinforcement and repair work
- Attachment of railing posts, guardrails, or fencing
- Foundation and wind turbine tower
- Bridge base plates and bearings
Proper application guarantees safety, durability, and load transfer.
Tools and Materials Needed
Before application, gather the tools and protective gear needed:
Tools:
- Drill (for making holes)
- Wire brush and air blower
- Mixing paddle and bucket
- Grouting gun (for epoxy grout)
- Trowel or funnel (for cementitious grout)
- Measuring scale or tape
- Gloves, goggles, and a mask
Materials:
- Anchor grout (cementitious or epoxy)
- Water (for cementitious grout)
- Anchor rods or rebar
- Clean water bucket
- Surface cleaner or degreaser (for dirty surfaces)
Step-by-Step Application Instructions
Step 1: Planning and Site Inspection
- Check structural plans and load specifications.
- Establish anchor position, size, and shape.
- Check base material conditions (concrete or masonry).
- Allow sufficient curing time for new concrete (typically 28 days).
- Check that the ambient temperature, humidity, and other environmental conditions are favourable.
Tip: Re-check ambient temperature within product application range, typically 5°C to 35°C.
Step 2: Drilling the Hole
- Drill the point indicated using a hammer drill or core drill, according to the base material.
- Consult the manufacturer's specifications for hole depth and diameter.
- The diameter of the hole will usually be 2–4 mm larger than the anchor bolt diameter.
- Drill 10–20 mm deeper than the anchor length for grouting space.
Note: For epoxy grouting, a threaded rod or rebar may be required in certain cases.
Step 3: Cleaning the Hole
Clean with care for maximum bonding and strength. The wet or dirty hole will reduce adhesion significantly.
Cleaning Procedure:
- Brush the inner wall with a steel or nylon brush.
- Dust with compressed air or an air pump.
- Rub and blow again a minimum of three times.
- Hole should be oil-free, dry, and free of moisture or debris.
Pro Tip: If contamination is suspected for epoxy systems, use a wetted lint-free cloth that has been immersed in a degreaser.
Step 4: Mixing the Grout
Accurate mixing results in a uniform, high-strength product.
Cementitious Grout Mixing:
- Place clean water into a container.
- Add dry grout powder gradually.
- Blend using a slow-speed drill and paddle 3–5 minutes to lump-free consistency.
- Ensure consistency, pourable or flowable, as necessary.
Mixing Epoxy Grout:
- Mix resin and hardener per the manufacturer's ratio (typically 2:1 or 3:1).
- Blend with a paddle mixer for 2–3 minutes.
- Do not whip air into the mix to reduce bubbles.
Warning: Don't retemper or add too much water or hardener—it will thin the mix.
Step 5: Placement of Grout
There are several ways of grouting depending upon the direction and nature of the grout.
For Cementitious Grout:
- Grout progressively by pouring with a trowel or funnel from one end with grout.
- Seal the hole 100% without the presence of air voids.
- Insert the anchor rod immediately in a twist so that it is in complete contact.
- Don't move the rod within the initial setting time (usually 30–60 minutes).
For Epoxy Grout:
- Fill with grout in a grouting gun or syringe.
- Charge with epoxy in the hole base, slowly retracting the gun to fill.
- Install the anchor rod by rotating in a clockwise direction.
- Leave in place until the grout gels.
Warning: Avoid overfilling the hole; more material than needed can cause hydraulic pressure and cracking.
Step 6: Final Finishing and Curing
Final curing and finishing are critical to final strength and performance.
Finishing:
- Trim off excess grout at once with a trowel or a cloth.
- For exposed surfaces, tool the grout smooth with the surface for appearance.
Curing (Cementitious Grout):
- Keep the area in a moist condition for at least 24 hours.
- Use wet burlap, curing agents, or plastic sheeting.
Curing (Epoxy Grout):
- Let it cure for the manufacturer's recommended time, typically:
- 8–12 hours for light loading
- 24 hours for full loading
- Do not vibrate, load, or transfer during this period.
Step 7: Application of Load
After the given curing time:
- Check alignment and embedment depth of the anchor.
- Conduct a bond test by light tap or pull test (if required).
- Load on gradually without sudden impact.
- Avoid overloading the anchor beyond its design load capacity.
- Perform load tests in high-consequence applications to justify performance.
Safety Precautions
- Use PPE (gloves, goggles, masks) always.
- Work in well-ventilated conditions, especially with epoxy products.
- Avoid contact with the skin; wash immediately with clean water if exposed.
- Dispose of waste product under local environmental regulations.
Common Errors to be Avoided
- Drilling the incorrect diameter or depth
- Improper anchor hole cleaning
- Incorrect mix ratio of water or resin
- Premature use after mixing (bucket grout set)
- Untwist the rod insert
- Pre-mature application of load before the anchor's complete curing
Advantages of Proper Anchor Grouting
- Improved structural stability
- Transfers loads securely
- Resistant to vibration loosening
- Environment-resistant
- Extends installation life
Conclusion
Anchor grout, installed and applied correctly, provides secure anchoring of rods, bolts, and reinforcement in concrete or masonry. In structural steel repair, or machinery or building construction, correct anchor grout installation is a performance, safety, and reliability booster.
Following step-by-step guidance—from drilling and cleaning to mixing, grouting, curing, and ultimate load application—you can get a professional and long-lasting anchor system.
Always consult the product datasheets and the manufacturer's best practices guidelines.
Pro Tip: As a general rule, if you're unsure, test with a trial mix or mock-up application. When the structural application is critical to the structure, consult a structural engineer or technician.
Also Read: SS Flux Cored Wire vs. SS Solid Wire: Which One to Choose?